- May 19, 2024
Excel Accounting Tip: Combine Two Columns of Transaction Data into One Column and Change Credits to Negative
- David McRee
- 0 comments
Often we need to export financial transaction data from accounting software into Excel. It isn't always arranged the way we need it. For instance, imported trial balance data might look like this:
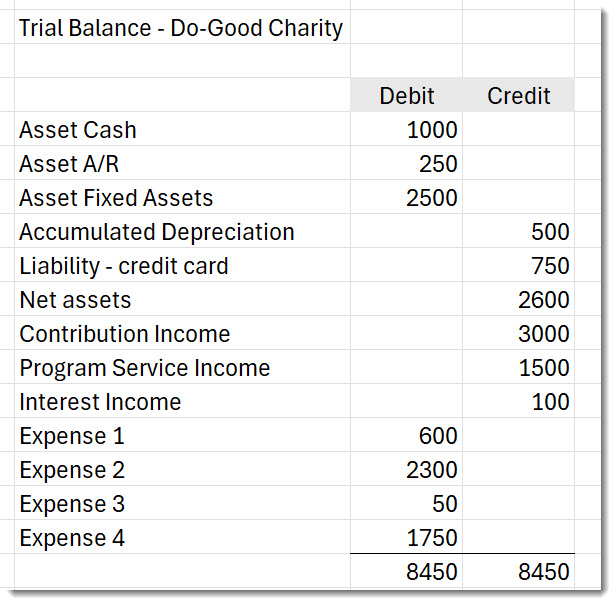
What we need is for both debits and credits to be in the same column, and we want the credits to have a negative sign, as they would in double-entry accounting, like below:

In the above video, I demonstrate how EASY it is to make this happen. And, here are the steps to get it done:
1. Add a New Column for Adjusted Debits:
- Insert a new column next to your existing debit and credit columns. This will be where your combined values will appear.
2. Apply a Formula to Combine Debits and Credits:
- Assume your debits are in column A and your credits are in column B. In the new column (let's say C), in the first row of data (assuming row 2 if row 1 has headers), enter the following formula:
=A2 - B2
Note: if you want the debits to be negative and the credits positive, just reverse the formula (=B2-A2). Of course you will need to enter the formula and reference the cells according to your worksheet. Probably you won't be using A2 and B2.
- This formula takes the debit amount and subtracts the credit amount (since credits are to be shown as negative, subtracting them effectively changes their sign).
3. Copy the Formula Down:
- Drag the fill handle (small square at the bottom right of the cell) down through the column to apply the formula to all other rows in your data.
4. Optional - Replace Original Debit Column:
- If you want to replace the original debit column with this new adjusted column, you can copy the entire new column (Column C), and then use "Paste Special" to paste values only over the original debit column (Column A). This action replaces the formulas with their calculated values.
- After pasting, you can delete the original credit column and the new column you created for calculation, leaving only the updated debit column.
5. Finalize Your Worksheet:
- You can now delete the credit column as all the information is consolidated into the debit column. Make sure to check the accuracy of the data transfer before deleting any data permanently.
This approach will leave you with one column where all debits are positive, and credits are negative, as required.
If you'd like to learn a simple method for keeping a great set of books with Excel, check out my video-based instruction right on this website: Basic Bookkeeping with Excel.